
This week we will finally commence to the next phase: a working robot. The bottom PCB and frame is complete and ready for programming. This will enable us to build a robot that can drive around. Soon the top pcb will be finished and the sensors for the ball detection will also be linked to the movement. For now, we have started with programming line detection and general movement. As of now the robot is capable of moving in pre-programmed directions..
Line detection
For the line detection we successfully programmed the neopixels that will light up the field underneath the robot which enables the robot to detect the difference in reflected light using phototransistors. Because the playing field is green and the lines are white a big difference in reflected light can be measured. The phototransistors that will detect the lines have also partially been programmed. As soon as this is complete we can achieve a very simple but crucial objective and that is to stay in bounds of the soccer playing field. If the robot would go out of bounds, it would get a 30 seconds time penalty before re-entering the playing field.


Machine Vision
Another component that will help the robot guide its movement is the OpenMV camera module. In order to test our code before we mount the camera and mirror (for 360 degree view) we created a simple prototype to test the proof of concept.

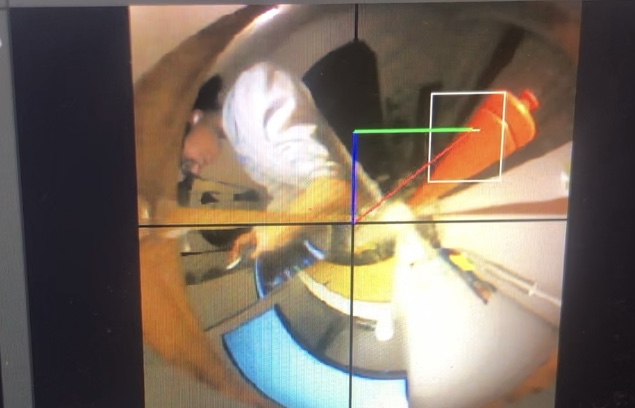
The goal of implementing a camera module to the robot is to track the scoring goals on the playing field, the opponents, and the lines
We are using the OpenMV H7 R2 camera module. This is a small, affordable, and expandable machine vision module that allows for easy implementation in various projects. Programming the camera in combination with the OpenMV IDE is simple and effective. Thanks to OpenMV’s sponsorship we are able to use their camera for our robots which greatly increases its capabilities. Thank you OpenMV! Make sure to check them out at https://openmv.io/
Finally, the programmers are working on a flowchart that depicts how the code will be constructed and what our strategies and tactics are. The flowchart will give a clear view of the basic software requirements and guides us during programming.


